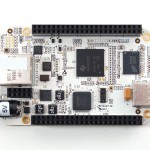
BeagleBone First Impressions
I finally ventured into the world of embedded ARM and Linux on ARM. Having done a good share of embedded Intel i386 projects I am no stranger to embedded Linux. But it is my first adventure into the world of non-Intel Linux. I’ve looked at the Raspberry Pi but it has been an Unobtainium unless one wanted to pay exorbitant eBay prices. Regular sources seemed to be regularly out of stock. While not in the same price point at all, the BeagleBone appeared to be a very capable ARM Linux development board. I placed an order for a BeagleBoard with adafruit for the BeagleBoard and a couple of extras. It showed up less then 2 weeks despite cross border shipping. With Debian being my favourite Linux distribution, here are my first steps in getting Debian booted on a 2GB micro SD card.
I started by reading http://elinux.org/BeagleBoardDebian. I use a MacBook with Mountain Lion and VMware Fusion I proceeded to build a very plain command line only (no X) Debian Wheezy VM. I then followed the instructions with minor variations.
First step was to get netinstall.
    git clone git://github.com/RobertCNelson/netinstall.git
    cd netinstall
I then connected a micro SD card via a USB reader. This allowed me to connect the micro SD card to the Linux VM instead of the Mac. To install Debian Squeeze:
./mk_mmc.sh --mmc /dev/sdb --uboot bone --distro squeezeThe the SD card was inserted into the BeagleBone and the BeagleBone was powered up via the USB cable and mini USB port. Initially I tried using the native Mac environment for terminal control of the BeagleBone. Unfortunately that resulted in some interesting garbage instead of the familiar text based Debian installer. After some investigation it I realized that the Debian installer uses the newt text based windowing environment. This did not play well with GNU screen in a Mac terminal session. I plugged the SD card back into the USB reader and attached it to the Wheezy VM. I then forced the Debian installer to use plain text mode. To do so I mounted the SD card
mount /dev/sdb1 /mntand edited the uEnv.txt file. The line containing bootargs was changes. The DEBIAN_FRONTEND=text was inserted right behind bootargs. The SD card was unmounted and once again plugged into the BeagleBone.
umount /mntTry two of installing Bebian Squeeze, still using GNU screen in a Mac terminal box, proceeded fine. Until I came upon the network configuration. It would have been to easy to plug an ethernet cable into the BeagleBone, but no, stubborn me wanted to use the USB network gadget thing native to the BeagleBone. No luck getting this to work in Mac at all. So I configured the Wheezy VM to support the USB network gadget.
First I installed udhcpd, a light weight dhcp server.
apt-get install udhcpdI then replaced the example /etc/udhcpd.conf file with my own version.
# /etc/udhcpd.conf

interface       usb0
max_leases      1

start           192.168.99.20
end             192.168.99.20

opt     dns     69.71.68.202
option  subnet  255.255.255.0
opt     router  192.168.99.1

# End
This was complimented with a network configuration for usb0 that included starting up udhcpd and applying some NAT rules to allow internet access for the BeagleBone. This is what I added the /etc/network/interfaces
# The omap usb network interface
allow-hotplug usb0
iface usb0 inet static
address 192.168.99.1
netmask 255.255.255.0

up /sbin/iptables -A POSTROUTING -t nat -j MASQUERADE -s 192.168.99.0/24
up /sbin/sysctl -w net.ipv4.ip_forward=1
up /usr/sbin/udhcpd -S
down /sbin/iptables -F -t nat
down killall udhcpd
I then connected the BeagleBone once again via the USB cable to my host system. This time I elected to connect the serial connection and the network connection to the Debian Wheezy VM. In order to start up the terminal session I used GNU screen.
screen /dev/ttyUSB1 115200It only took 3 tries to get Debian Squeeze installed on the BeagleBone. I selected usb as my network connection. It brought up the usb0 connection on my host system automatically, configured IP settings and handed the BeagleBone an IP address via DHCP. It was my first time using the plain text Debian installer. But it proceeded just fine and all selections were pretty simple and intuitive.
The end result being Debian Squeeze on the BeagleBone!
