A Wireless Router Story
Things to do with a wireless router when it is not routing packets!
The Idea
Why build an embedded wireless Linux router?
Cost: The alternative to getting high speed data access would have been to install one or two pairs of dedicated copper and drive those with SHDSL modems. The one time installation cost would have been equal to the cost of the material for the wireless connection. But the local Telco would have the pleasure of sending me a bill every month. In contrast, the airwaves are free, especially in the unlicensed 2.45GHz range.
Speed: Even though I joined the wireless game early on, way before 11Mbps wireless access points, the Proxim Symphony cards certainly beat 56kbps modem access. However, at an effective throughput of 400kbps, the selected Proxim Symphony cards are no match to a 2Mbps SHDSL connection. Maybe sometime in the future, when my bandwidth demands grow beyond bounds, the routers will be refurbished with 44Mbps cards.
Challenge: It was great fun seeing this project come together. In the beginning there was an old Pentium desktop booting from a single floppy, and at the end there was an embedded single board computer booting from flash disk with ‘value added services’ like webcam and thermometer.
Finally: Just because I can, why else?
Raw Materials
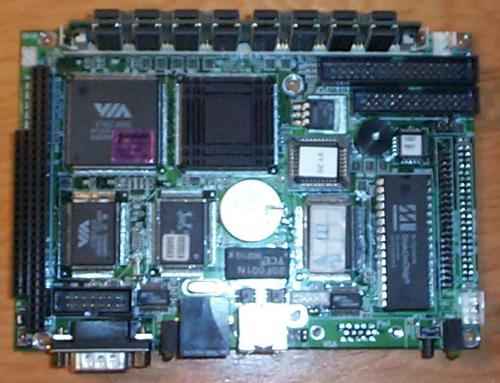
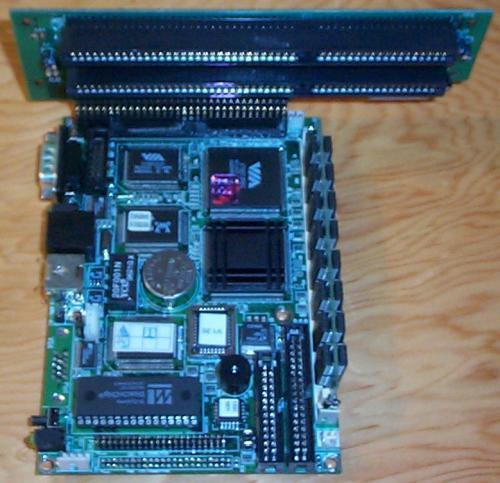
The hardware platform for the current version of the wireless router is an Advantech PCM-4823L single board computer (SBC). The brains of the SBC is an AMD 5x86-133 processor. The board has all the interfaces usually found on a desktop PC except for onboard video. Note that a version of the PCM-4823 including video exists. However, in the application as a wireless router mounted in a remote location video is not really needed. The interfaces available are: one parallel port, two serial ports, IDE interface and floppy interface. It also features a socket for onboard DiskOnChip from M-Systems. The SIMM memory slot has been filled with a 32MB stick. Network connectivity is provided by the onboard NE2000 compatible 10base-T ethernet interface.

Unfortunately I wasn’t able to find any PC/104 wireless cards when this project was started. An alternative would have been to choose a PCMCIA PC/104 adapter and install a wireless PCMCIA card. The advantage of this approach would have been a perfect fit of the wireless adapter to the form factor of the SBC. But the cost for the adapter card was rather high and wireless PCMCIA cards were usually more expensive than their PCI or ISA counterparts. Configuring PCMCIA on the embedded Linux system is complex and requires disk space and memory for the cardmanager and configuration files. PCI and ISA do not require a cardmanager. I found a riser card with 2 ISA slots which fit nicely into a PC/104 slot. It is available from Circuit Specialists as part number AR-B1052. It fit quite well and the second ISA slot is handy for connecting a video card during development.
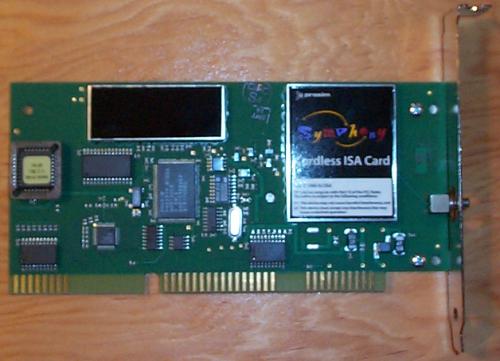
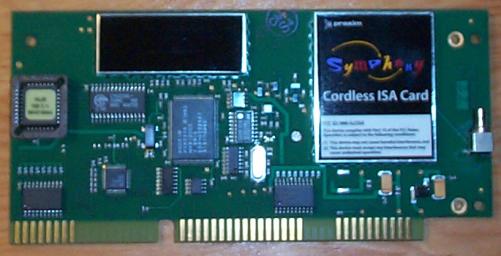
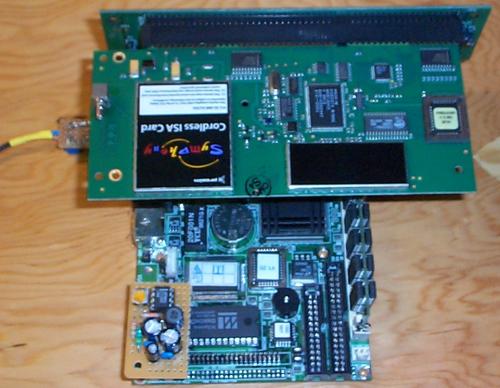
The heart of a wireless router is the wireless network adapter. The card selected for this project was a Proxim Symphony ISA PnP card. At the time this project was started the IEEE 802.11b standard was still in it’s infancy. The Proxim Symphony adapter was one of the first wireless adapters targeted at the average home user. Thanks to Dave Koberstein there is a Linux driver available for this wireless adapter. The advertised throughput of the Proxim Symphony ISA adapter is 1.6 Mbps. In real life I have seen speeds of up to 400kbps. If I were to source the parts for a wireless router today I would opt for one of the many IEEE 802.11b adapters available; keeping in mind that PC/104 is essentially a repackaged ISA interface requiring an ISA wireless adapter.

The advertised range of the card with the included omni directional desktop antenna is 150 feet without obstructions. As distance increases beyond the 150 feet mark throughput rapidly decreases and latency increases. It became clear early on that the Proxim supplied antenna was not sufficient for an outdoor application spanning several hundred feet. Til-Tek is a Canadian company specialized in manufacturing cost effective high quality antennas. The TA-2411 provides 11.5dBi of unidirectional gain which is more than sufficient for covering a few hundred feet between sites.
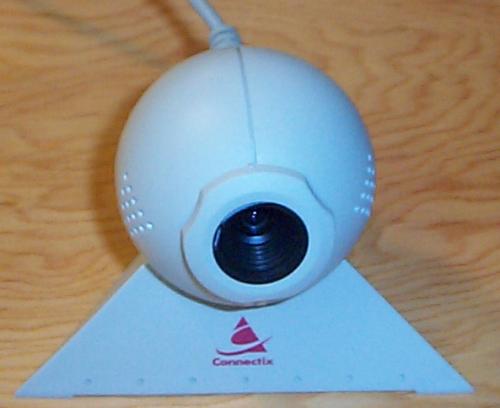
What else could an embedded box do other than route packets? Since the SBC has parallel and serial ports I wanted to do something unique, something not commonly found in a router. To mind came an old Connectix QuickCam, now a Logitech product. This camera is an older model which connects to the parallel port and is powered by an adapter that fits between the keyboard and the keyboard connector on the motherboard. The Linux driver for this camera is cqcam. It supports the Connectix and Logitech Color Quickcam and Color Quickcam 2. Unfortunately the currently shipping Quickcam VC (with parallel adapter) is listed in the unsupported section. There we go, now we have a wireless router that not only routes packets but also provides entertainment by serving live pictures via a webcam and built-in webserver.
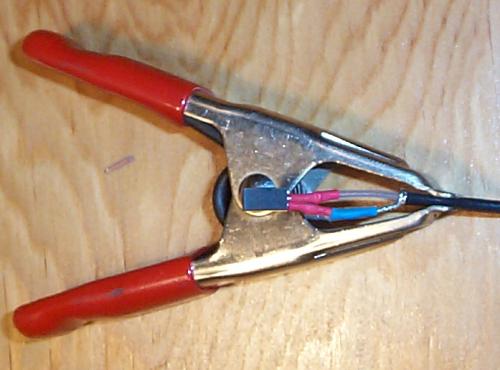
But that’s not all! There are still unused serial ports, one of which features a standard DB9 connector. It would be interesting to be able to record temperatures with an outdoor mounted router. The Dallas Semiconductor DS1820 (datasheet) is a 1-Wire Temperature Probe. Inside this 3 pin TO-92 package is a temperature sensor, analog to digital converter and logic that allows the device to be accessed and powered by a single wire serial bus. The DS1820 is capable of 0.01 degree resolution at 0.5 degree accuracy. Each device contains a unique serial number which allows it to be explicitly addressed among several devices on the same serial bus. So with just one interface adapter that connects to the serial port of the single board computer it is possible to monitor several temperatures, like outdoor and router case temperatures.
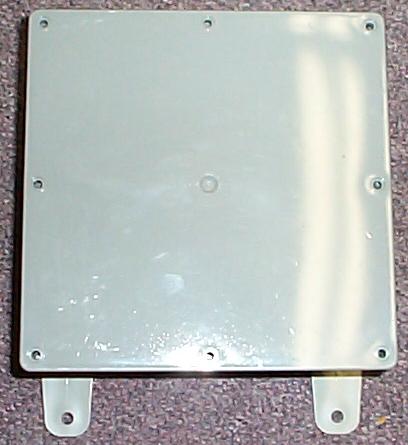
Since the planned location for the assembled router would be on the outside of the house a weatherproof enclosure was required. A very easy to work with box can be obtained from electrical supply places. The ABS box is quite easy to work with. The material is soft enough for machine screws to create their own thread if a small hole is provided for them. The snug fit of the screws in the case provides for moisture resistance. A seal for the lid is provided with the enclosure. Larger holes for rubber grommets can easily be cut using a dremmel tool and a router bit.
Homebrew
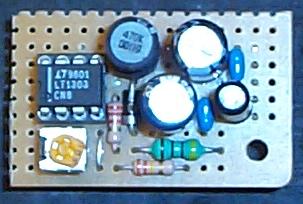

The PCM-4823 requires a single 5V power supply to function properly. However, the wireless card depends on +12V for proper operation. Monitoring the current draw of the wireless card under different operating conditions showed a consistent draw of 32mA from the 12V power source. Rather than provisioning a dual power supply a switched mode DC/DC converter was designed. The converter circuit boosts the 5V supply voltage to 12V with 80-90% efficiency. This made it possible to power the wireless router from an inexpensive regulated 5V 2.4A table top switched mode AC adaptor. The AC adapter and DC/DC converter parts are available from Digi-Key.
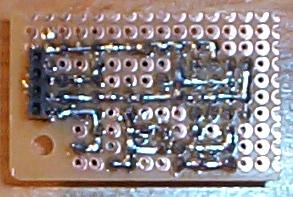
The DC/DC converter is a standard design using the LT1303 (datasheet) micropower switcher from Linear Technology. The LT1303 is available in an 8 pin DIP package which is easy to work with on an punchboard. The device requires very little external circuitry. Some notes about the external components. When selecting the capacitors low ESR types should be preferred. The 1N5817 is a standard shottky diode capable of sustaining a 2A switching current. The choke used needs to be able to sink 1A without saturation. With all switch mode power supplies it is important to keep the circuit paths short and wide. Escpecially the junction of L1, D1 and pin 7 of the LT1303 should be kept as short as possible since the peak current can be quite high in this location. Because the single board computer is powered through a power connector on the riser card, the power header on the board is used to electrically and mechanically attach the DC/DC converter.
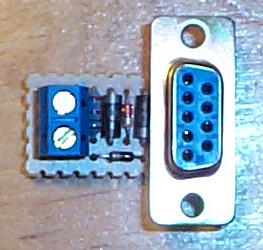
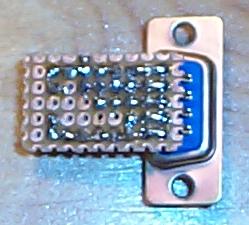
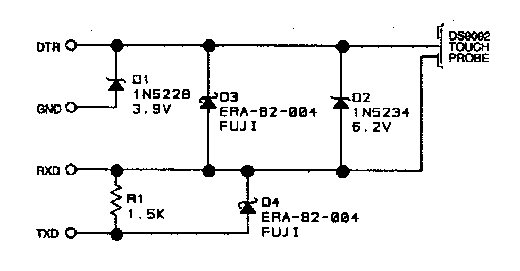
The serial adapter is a circuit design provided by Dallas Semiconductor. It can be found in one of their iButton datasheets. iButtons are also 1-wire serial devices. There is limited space available between the DB9 serial port of the SBC and the ABS enclosure wall. For the serial adapter to fit into this space it had to be attached at a right angle to the DB9 connector. This unusual design will not fit onto a desktop PC but is ideally suited for this application. It even allows for the adapter to be removed and attached while the SBC is securely fastened to the enclosure. There is not much else to say about the adaptor except that the diodes shown in the schematic can be safely substituted for standard 1N5817 shottky diodes.
All the parts and pieces fit quite nicely into the 8x8 inch ABS enclosure. However when the time came to connect the antenna to the wireless card it turned out that there wasn’t quite enough room to attach the antenna lead to the card without a sharp bend. Removing the RF jack from the wireless adapter and soldering it into place turned 90 degrees solved the problem. Another problem was the fact that the connector seems to be some SMC type RF connector whereas the Til-Tek antenna expects a standard N-type connector. My solution was to cut the supplied omni directional antenna and fit a N-type connector to the end of the original antenna lead. In retrospect, it would have made more sense to replace the jack on the wireless adapter with something more common.
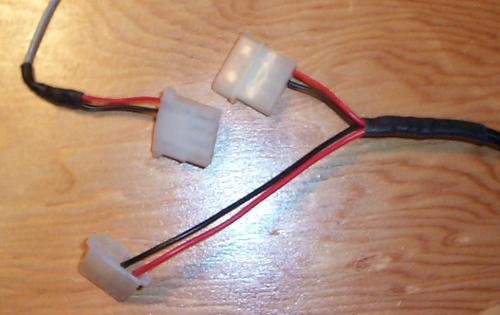
The AC adapter shipped with a coaxial type power plug. For the purpose of the wireless router this plug was rather useless. It was replaced with 2 connectors commonly used to connect 3.5” hard disk drives inside computer cases. One of the power connectors connects to the riser card to power the wireless router and the other power connector powers the QuickCam. The AT style keyboard adapter was removed from the QuickCam and replaced with a connector which mates with the end on the AC adapter.
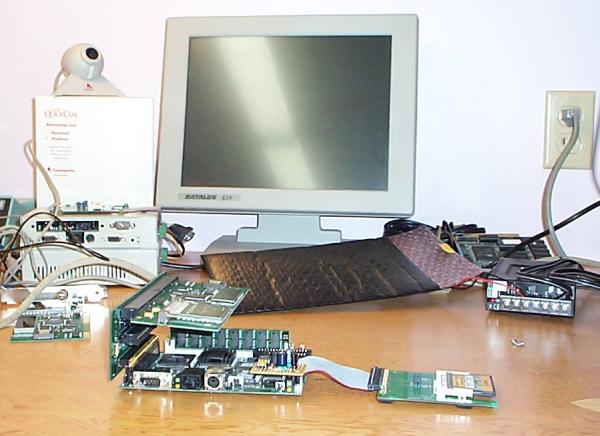
Development
During the development phase the whole wireless router was assembled on a work bench without enclosure. This allowed for peripherals like the QuickCam and wireless card to be connected and tested without modifications. The operating system of the router is PeeWeeLinux, a Linux distribution targeted specifically at embedded devices like routers and thin clients. PeeWeeLinux contains several features targeted at systems booting from read-only filesystems and running in ramdisks. It also includes support for the peripherals found on the PCM-4823L ‘out of the box’. Support for the QuickCam, image manipulation and temperature sensor were added to PeeWeeLinux during the course of development of the wireless router.
The router was designed to operate as an appliance. The disk drive is mounted read-only during the boot process. The kernel and a ramdisk image are loaded into memory and executed. Configurable system files are stored in a tar.gz archive on the flash disk drive and loaded during the boot process.
Keeping the disk drive mounted read-only prevents filesystem corruption. Power outage and brownouts will merely cause a reboot without any cause for concern. A small shell script allows for system settings to be saved. System files specified in a configurable list are written to the flash disk when the shell script is executed. During the save process there is a small window of opportunity during which the flash disk is mounted read-write and susceptible to corruption. Since configuration changes should be rarely necessary this is an acceptable risk.
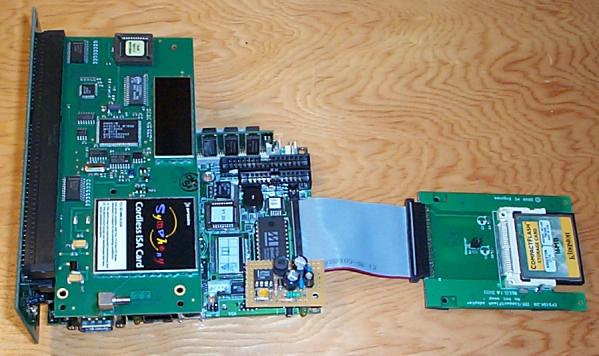
The flash drive used on the final product is a 16MB capacity M-Systems DiskOnChip device. The current operating system occupies only 3MB on the flash drive. A smaller device could have been used instead. Since it is rather awkward to load the onboard DiskOnChip device the development was done using a CompactFlash card attached to the SBC via an IDE - CompactFlash adapter. This allowed for the CompactFlash card to be programmed using a USB CompactFlash reader attached to the workstation with the development environment. The final image contained support for IDE, DiskOnChip and the syslinux bootloader installer. This allowed for the contents of the CompactFlash card to be transferred to DiskOnChip without any special programming tools.
The DiskOnChip is used as shipped by M-Systems with the original firmware in place and one large FAT formatted partition. The syslinux bootloader loads the ramdisk and kernel images during boot. Keeping the original DiskOnChip formatting in tact greatly simplifies loading the embedded Linux system onto the device. All that is required is to run the syslinux installer and to copy kernel and ramdisk images and the custom.lst file to the DiskOnChip. The custom.lst file is a simple text file listing the system files to be saved if the configuration of the operating system is altered at runtime.
The embedded Linux system contains a full suite of network tools. Most features expected in a basic router are present. The wireless router supports: ip aliases, ip firewall, ip masquerading (NAT), ip port forwarding, tunneling, etc. A range of network monitoring tools are installed: tcpdump, iptraf, netstat, etc.
The router is accessible for configuration changes and monitoring via telnet. The embedded webserver allows access to the webcam images and temperature readings. A ftp client allows for manual software updates in the field by downloading a new kernel and ramdisk image; however, there is no failsafe mechanism in place. A failed attempt to upgrade kernel and ramdisk will leave the wireless router in a nonbootable state requiring the DiskOnChip to be loaded with fresh content from an alternate boot device.
The PeeWeeLinux distribution contains the wireless project as an example.
** Assembly**
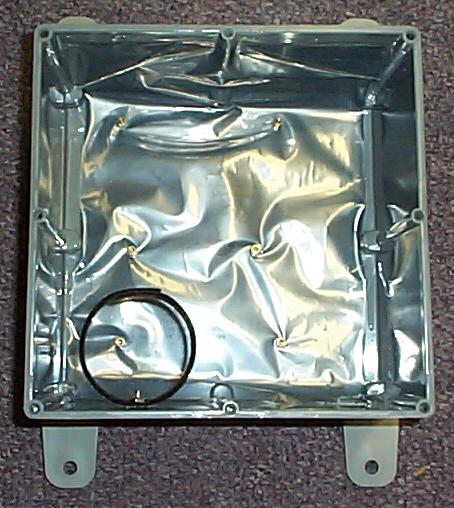
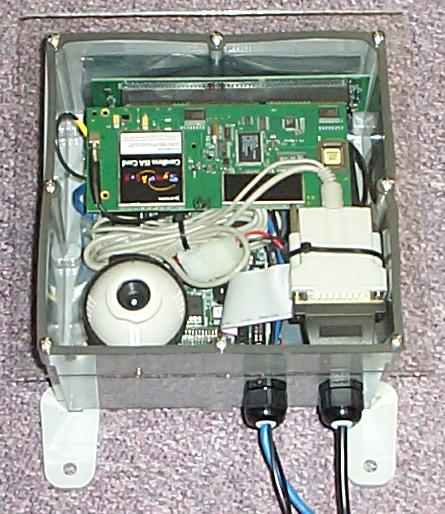
The 8x8 inch ABS enclosure was quite adequate for the wireless router once the modifications outlined above had been made. The ABS material does not provide for any RF shielding. One way to solve this problem would have been to coat the inside of the enclosure with conducting graphite spray. Instead a trimmed anti-static bag was used to line the interior of the box. It was a feeble attempt at providing RF shielding and some means of static charge control, but so far there has been no problem related to static discharge or RF interference. The anti-static lining is held in place by the mounting posts for the single board computer. These posts are standard hex studs used to mount motherboards in computer cases. The studs easily cut their own threads into pre-drilled holes in the ABS material.
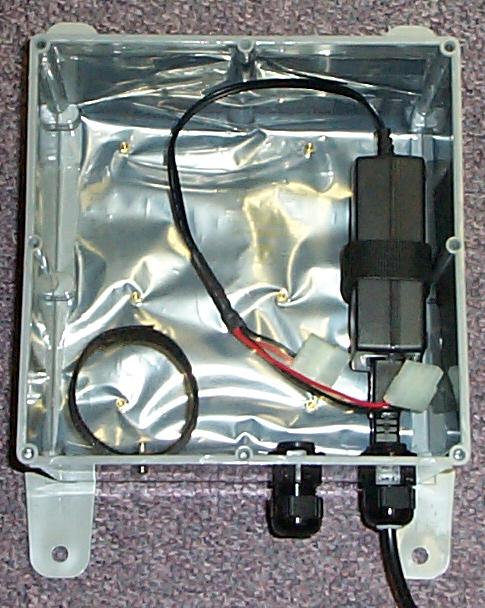
Velcro straps screwed to the enclosure worked fabulous to mount the switch mode power supply and to secure the QuickCam. Cable entries were waterproofed by compression type bushings. The compression method also provided for adequate strain relief of the wires. To minimize the risk of water entering the enclosure all screw holes were covered with silicone sealant. Two 1/8 inch drain holes were drilled on the bottom of the enclosure to ensure any accumulated moisture could escape. This also helped control condensation on the lid.
The lid supplied with the enclosure was also made of ABS. It had to be replaced with something transparent. Lexan was choosen because of it’s superior strenghts. It is almost unbreakable and drilling holes near the edge of the sheet presented no problem. The lack of a lip on the Lexan cover to contain the rubber seal presented a challenge. It took some effort to line up the edge of the enclosure and the rubber to provide a proper seal. The srews holding the Lexan cover should be tightened just snug enough to hold the rubber seal in place. The transparent lid causes a significant amount of glare if exposed to direct sunlight. It also causes the interior of the enclosure to warm up significantly. A future modification will be to use the original lid with a small Lexan window for the QuickCam.

Mounting the QuickCam required additional modifictions. It’s round body slipped out of the Velcro strap quite easily. The bottom of the QuickCam has a threaded hole for use with a tripod. A small screw attached to the box and protruding into the hole of the QuickCam solved this problem. The Velcro strap now allows for reasonable movement and placement of the camera.
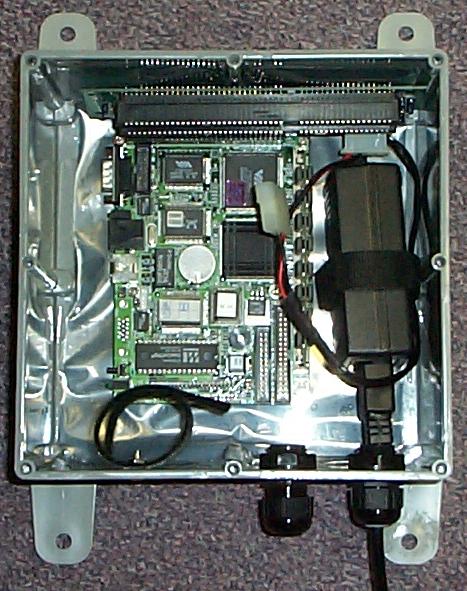
Fitting all of the components into the ABS enclosure was fairly straight forward. There was plenty of room, provided the assembled SBC was moved as far to the top of the case as possible. With the wireless adapter placed in the top ISA slot there was enough clearance for the AC adapter. This made the bottom ISA slot inaccessible which was not an issue with this design.
Initially there were concerns about the heat generated by the electronics and the lack of ventilation. The assembled wireless router warmed up approximately 20 Celcius above ambient temperature. During the winter months this is sufficient to keep the electronic components within their rated temperature range. If the box is deployed with southern exposure, heating due to the sun is a concern.
Any through holes in the enclosure were limited to the back and bottom sides. The cable entries were located in the bottom of the box. This should provide for adequate weather protection. Direct exposure to the elements is not recommended since the seal between the Lexan lid and ABS sides can be easily broken with little mechanical force. For exposed installation a different cover should be designed.
Conclusion
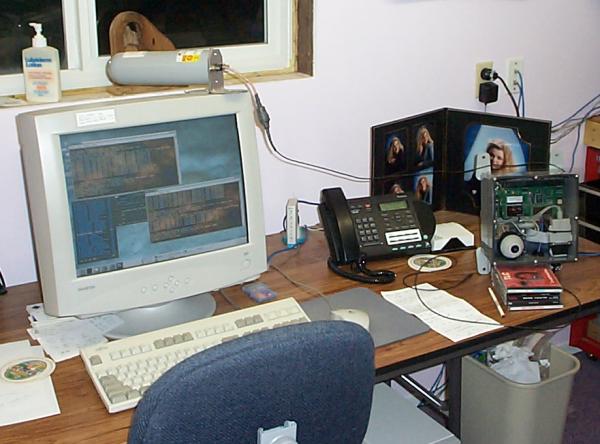
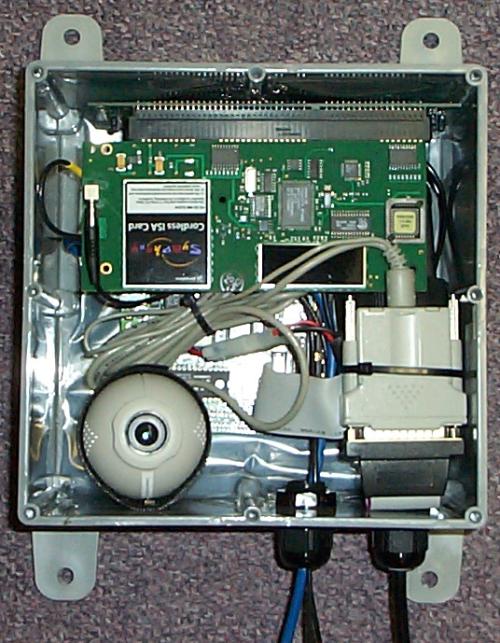
The image to the left shows the assembled router just before moving it to it’s current location on the gable of the house.
As of February 17, 2001 the box has performed flawless for 3 months in its main function as wirless router. The webcam has been a bit of a disappointment. The image quality is less than satisfying during daylight hours due to significant glare caused by sunlight. Relocation of the router is planned to reduce the problem. Exposure to the sun also causes the interior temperature to rise significantly. This will have to be addressed before the summer months to avoid turning the wireless router into a molten plastic glob.
Resources
Here are some links to the software used in this project:
- PeeWeeLinux, the embedded Linux operating system
- Proxim Symphony Driver, the Linux driver for the Proxim Symphony wireless adapter
- cqcam, the Linux driver for the Color Quickcam
- DigiTemp, the driver for the Dallas Semiconductor DS1820 temperature sensor for Linux amd Windows
Here are some links to the hardware used in this project:
- Advantech, manufacturer of the PCM-4823L single board computer
- Dallas Semiconductor, manufacturer of the DS1820 temperature sensor
- Linear Technology, manufacturer of the LT1303 micro power switcher
- Digi-Key, electronic components supplier
- Proxim, manufacturer of the Symphony wireless adapter
- Til-Tek, manufactures quality antennas
- Circuit Specialists, supplier of the riser card
- PeeWeeLinux, supplier of the CompactFlash adapter and CompactFlash used during development